
Repurposed a WatchGuard XTM 5 into an OPNsense firewall — this project started as a simple idea and quickly turned into a full rebuild.
The plan sounded straightforward enough: take an old WatchGuard XTM 5 Series, upgrade it a bit, install OPNsense on an SSD, and turn it into a proper rack-mounted firewall for the homelab.
What actually happened was a lot less graceful.
There was BIOS nonsense. Storage nonsense. Boot nonsense. And more than one moment where the whole thing looked like it was going to remain an expensive red paperweight.
But in the end, it worked.
And not in a “technically boots if you threaten it” kind of way either.
It now runs OPNsense from SSD, boots properly, updates properly, and has taken its place in the rack as a fully repurposed firewall.
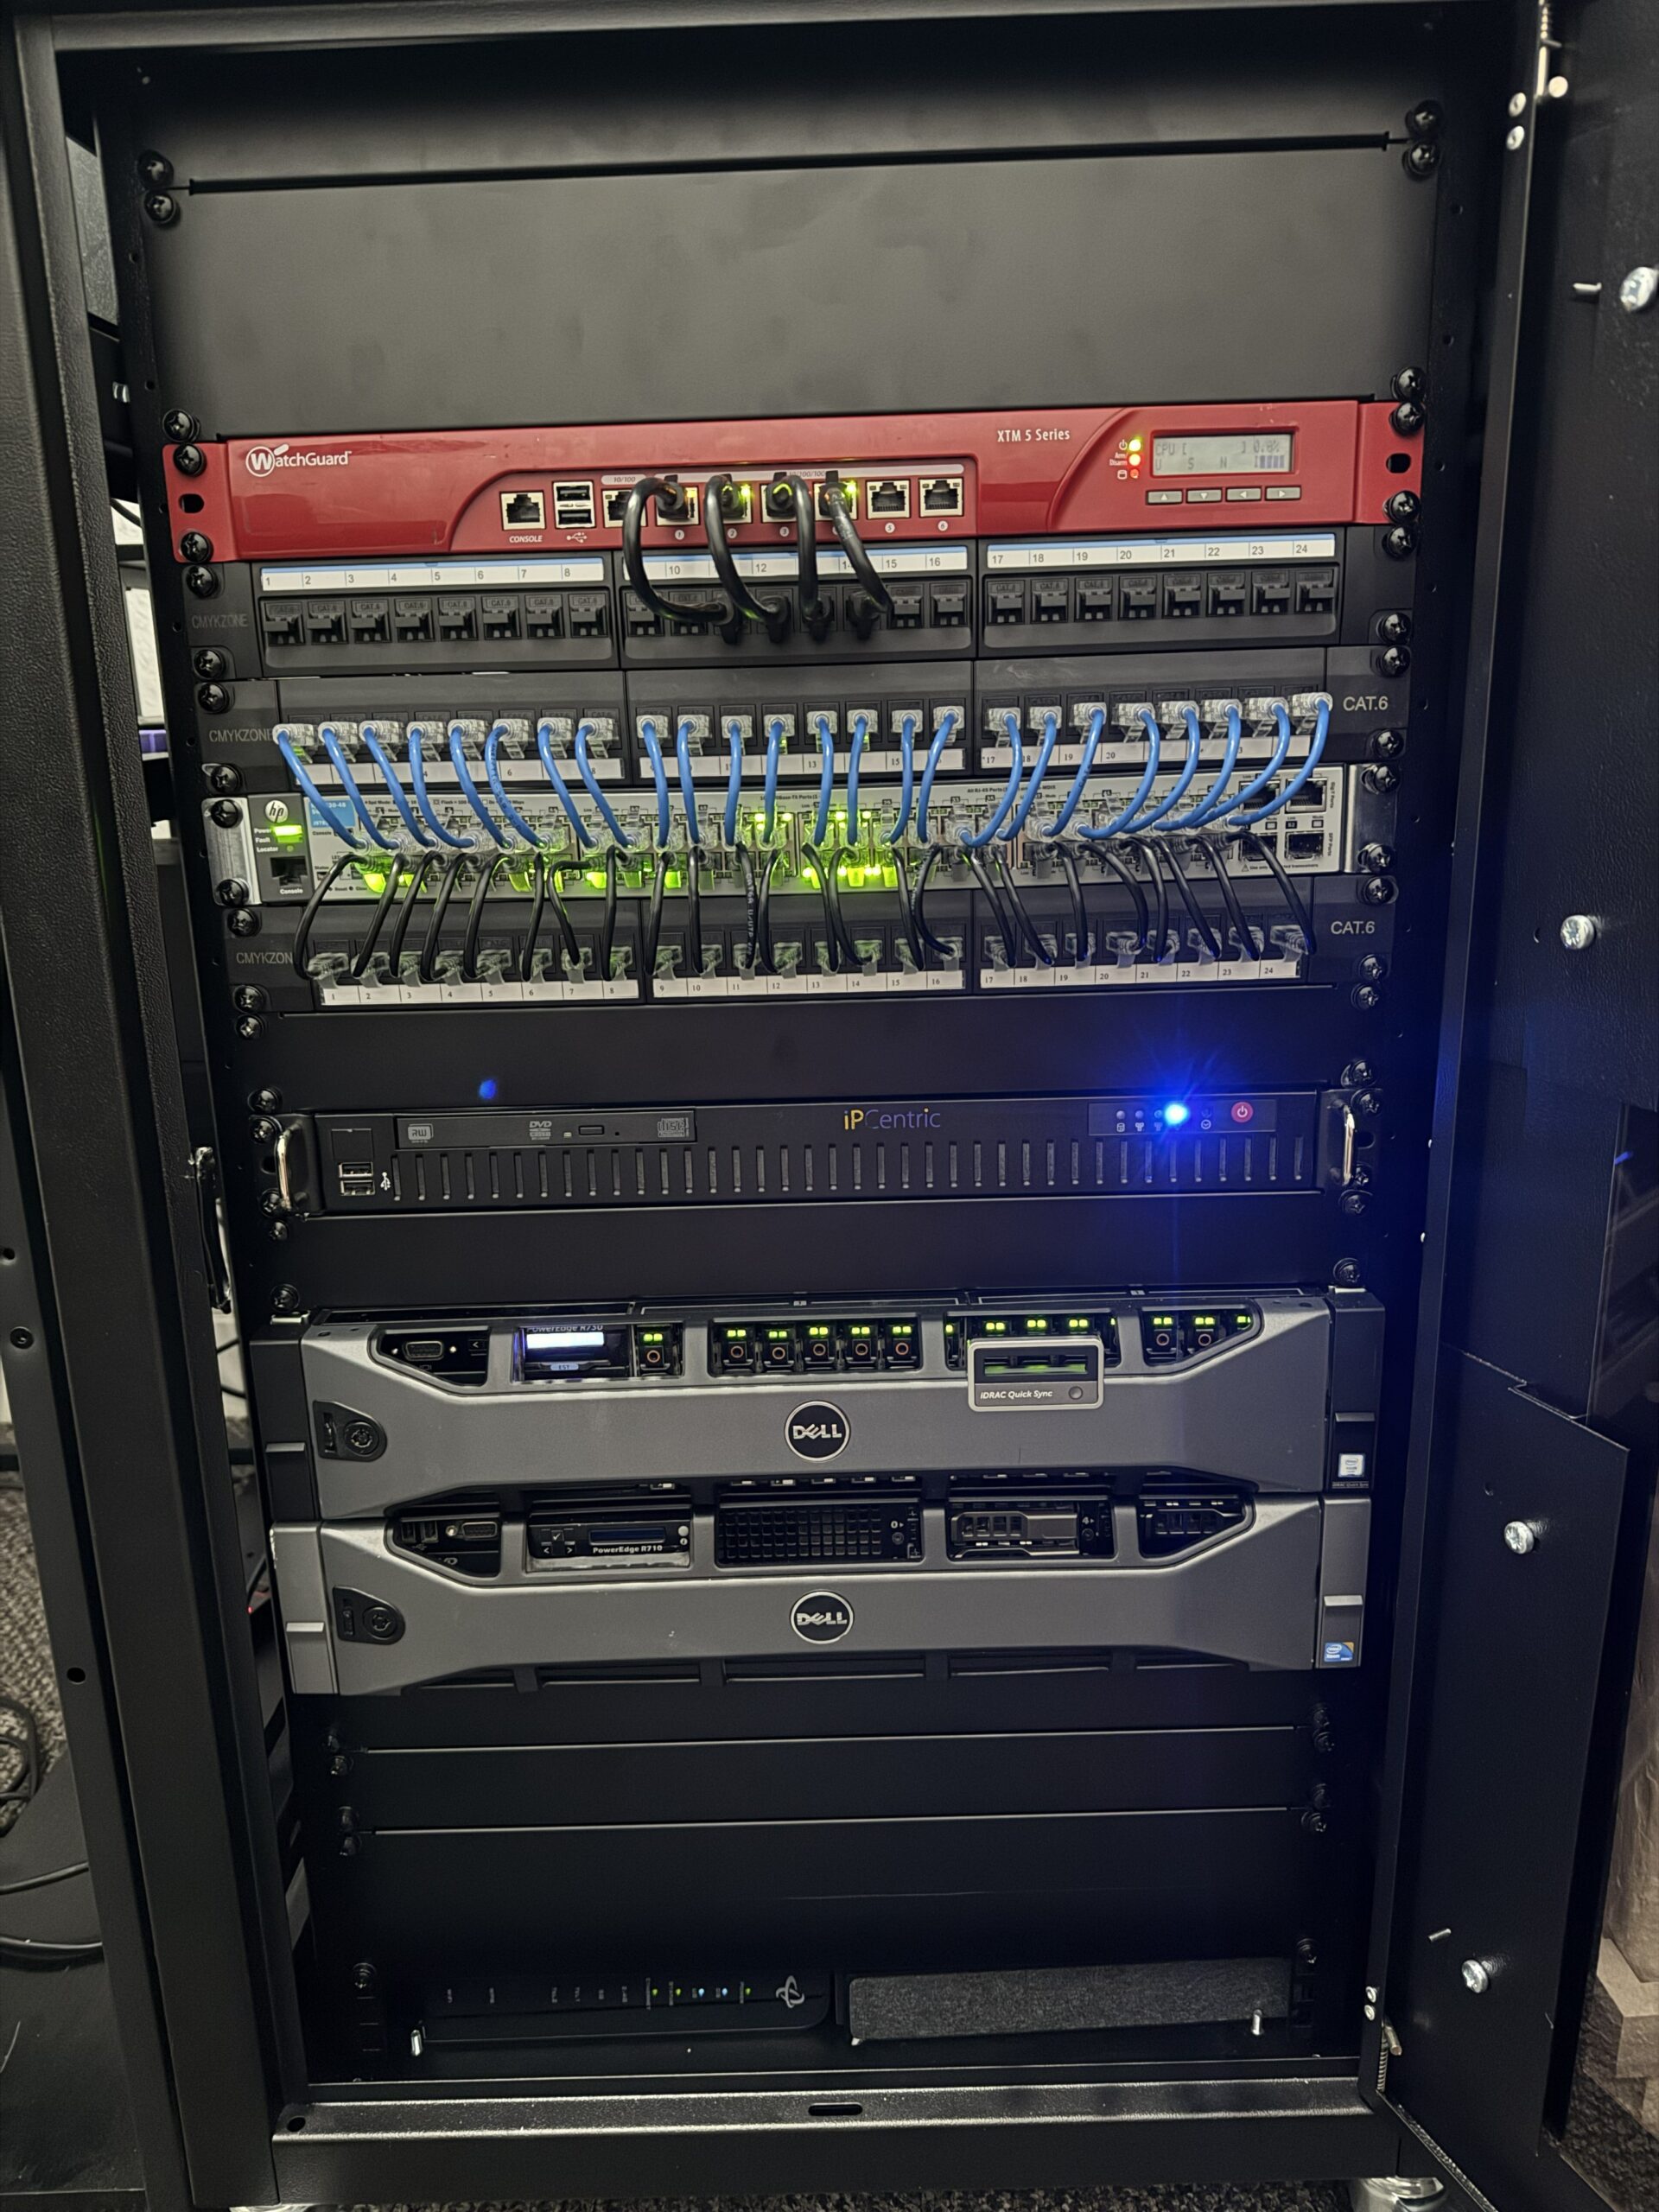
Final result: the WatchGuard XTM 5 Series repurposed and mounted back in the rack.
📦 Starting Point
The hardware itself was a WatchGuard XTM 5 Series firewall.
Out of the box, it was still very much a WatchGuard appliance rather than a flexible little firewall box ready for a second life.
It came with:
- WatchGuard firmware
- A tiny 1GB Compact Flash card as storage
- Locked-down BIOS settings
- Limited RAM
- No SSD installed
So this was never going to be an “upgrade OPNsense” job.
This was a full repurpose job from the ground up.
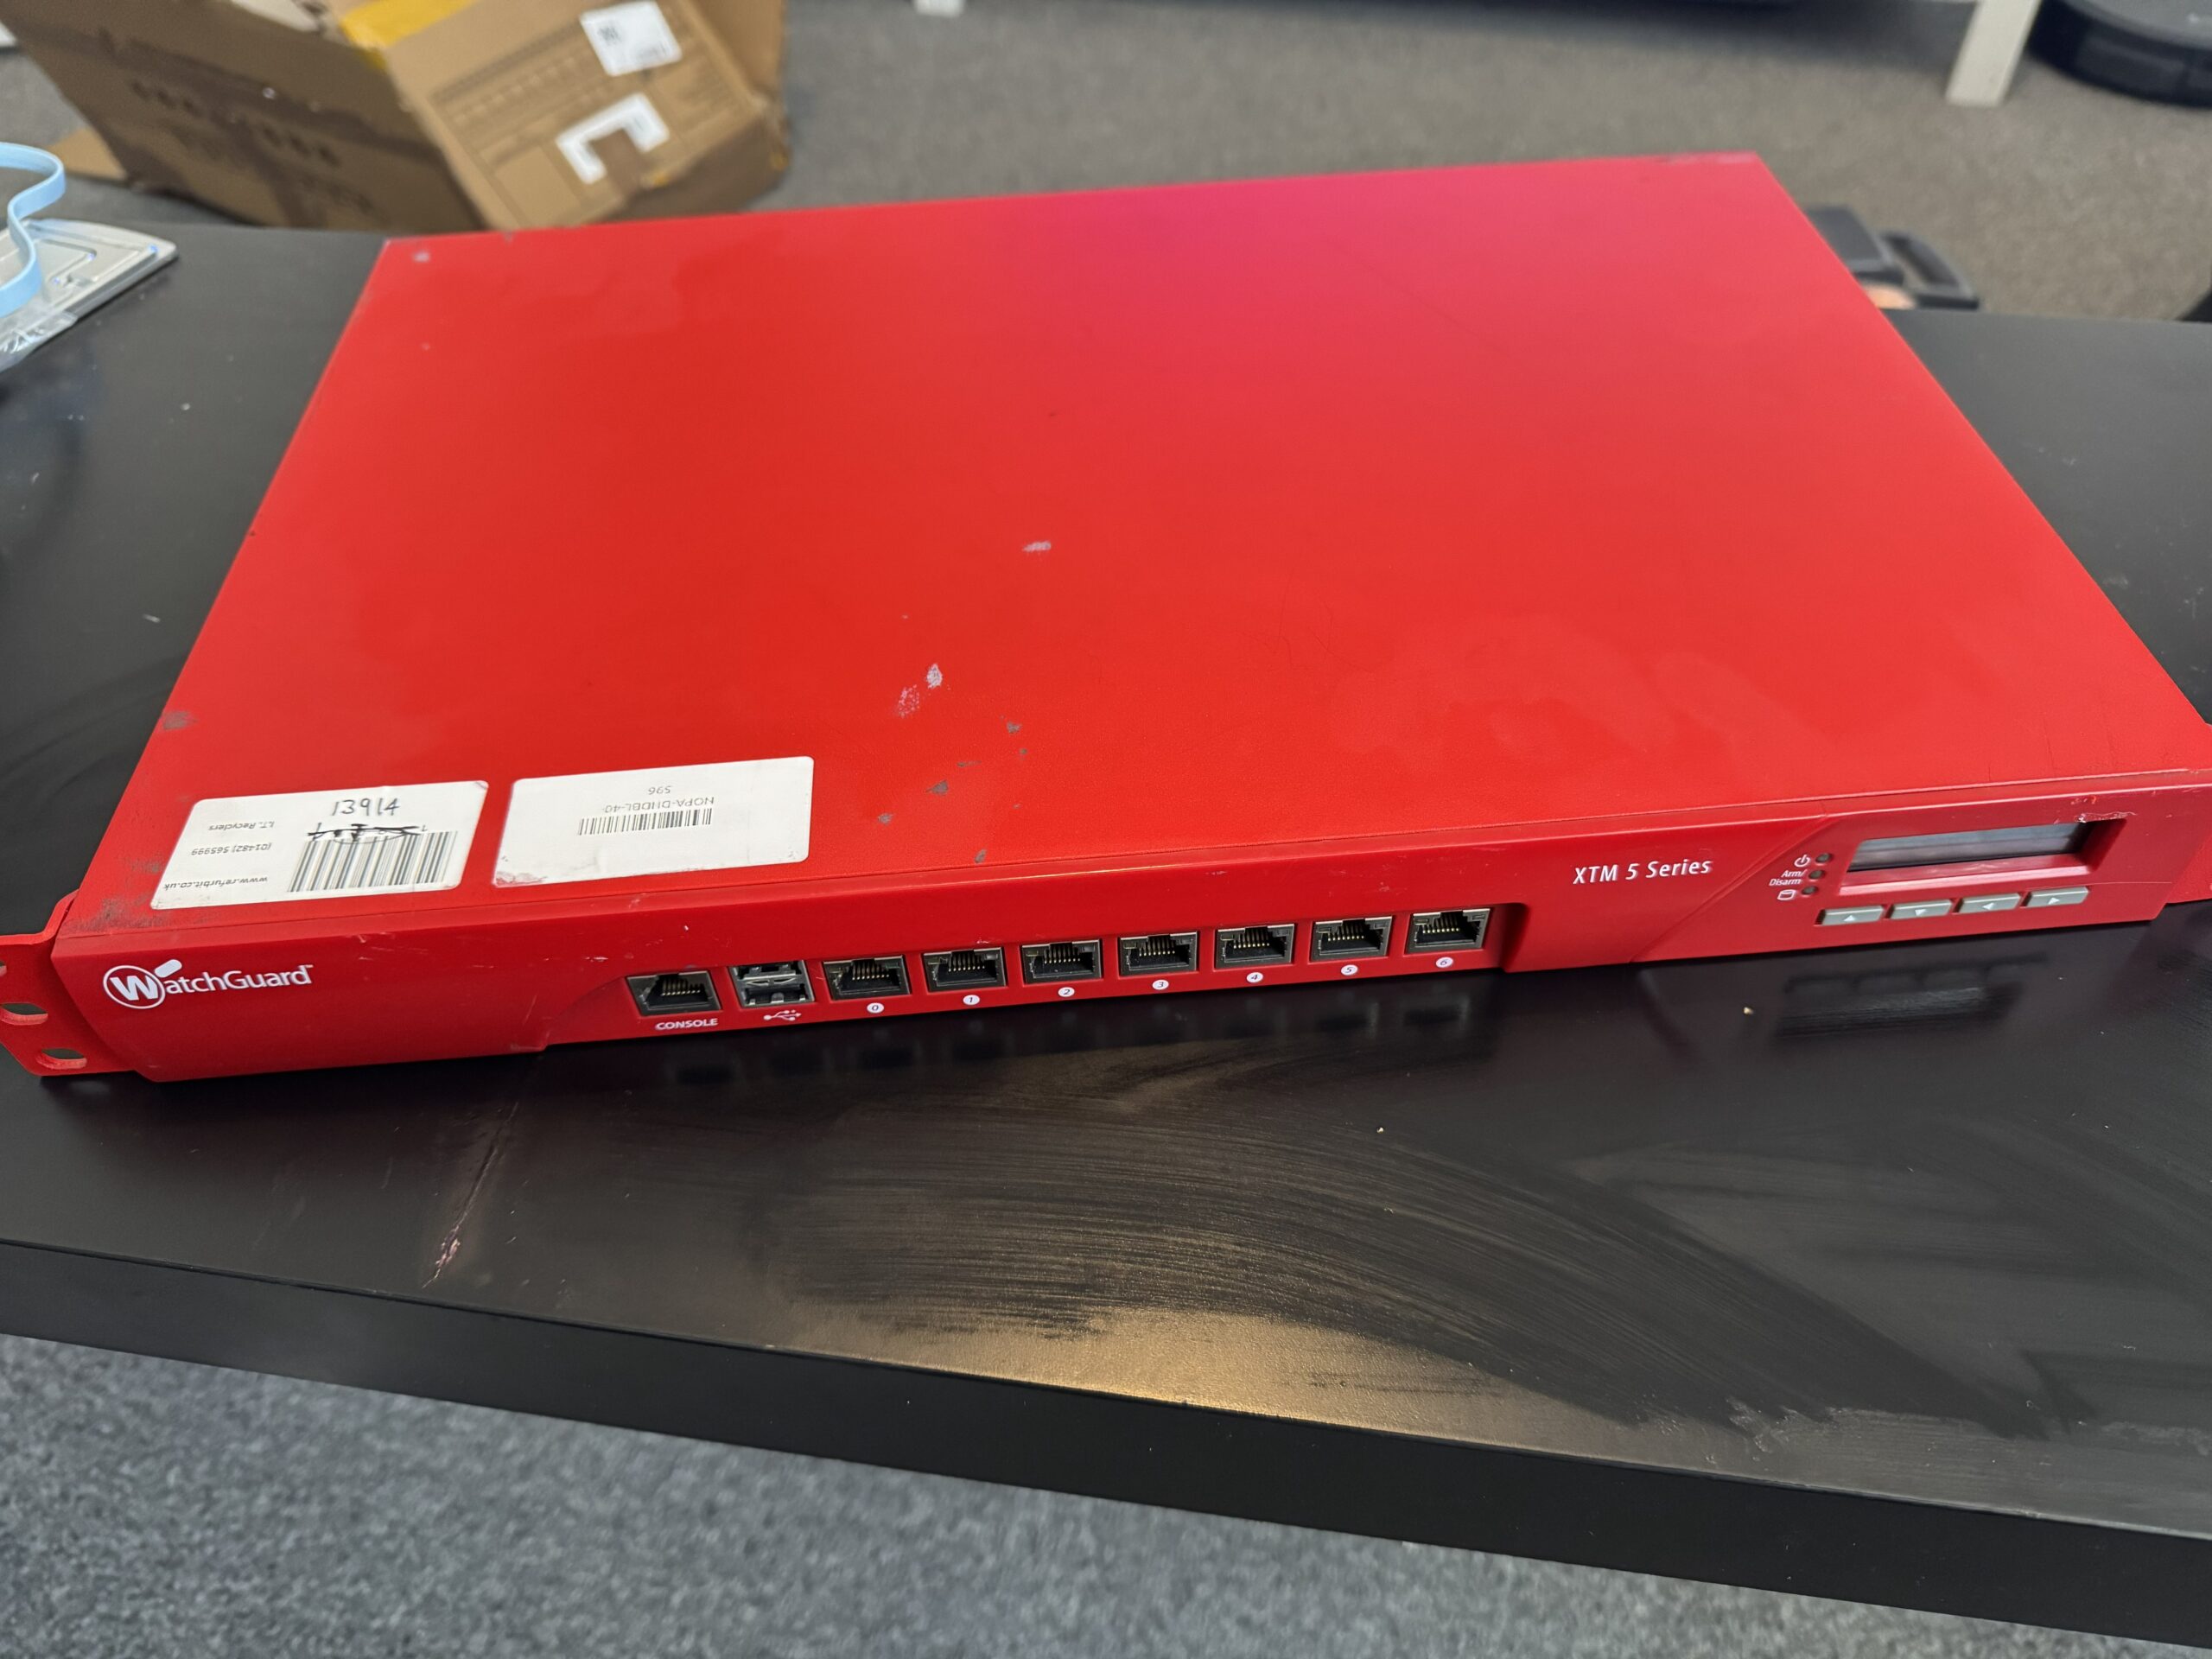
The WatchGuard XTM 5 Series before teardown and upgrade.
🔧 Opening It Up
First step: get the lid off and see what we were actually working with.
Inside, things looked promising enough:
- The CF card was acting as the main storage device
- The RAM was accessible and upgradeable
- There was a SATA connection available
That last part mattered a lot, because without SATA this would have gone from “interesting project” to “nice red metal ornament” very quickly.
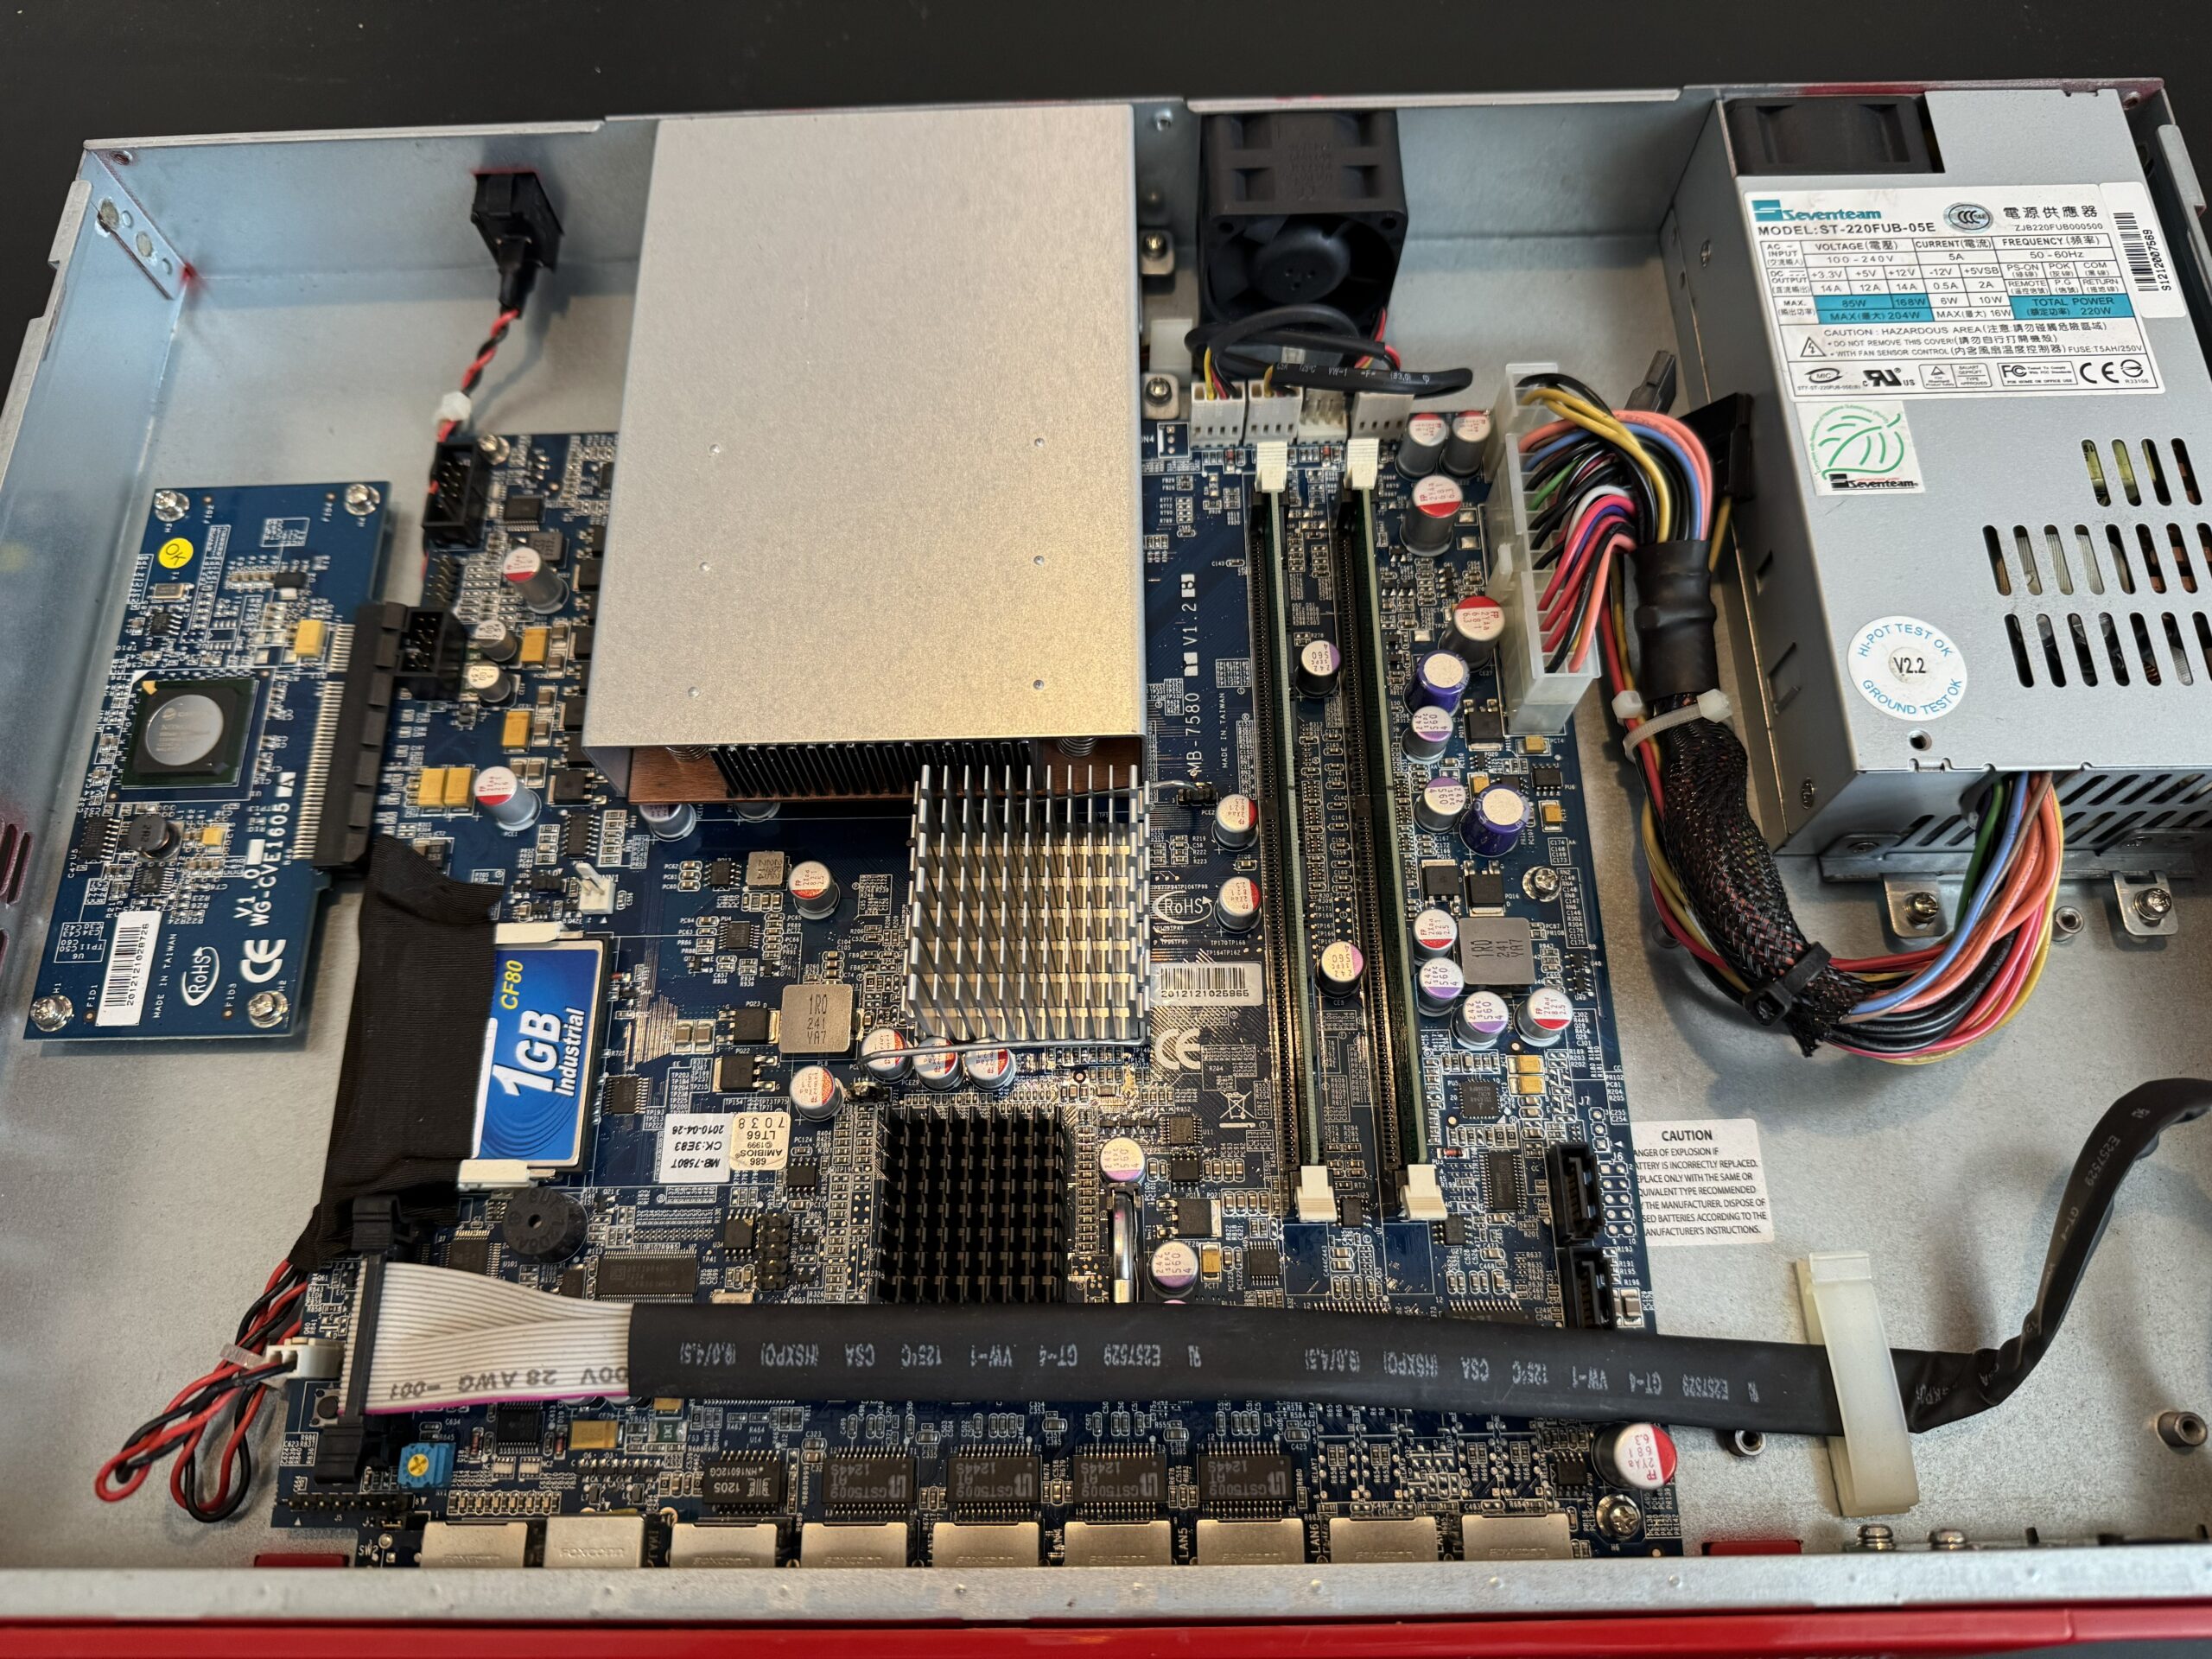
Inside the WatchGuard: compact, locked down, but workable.
🧠 RAM Upgrade
Before worrying about storage, the RAM got upgraded.
The new memory went in, the system booted, and everything was detected straight away.
For a brief moment, this project felt suspiciously easy.
That did not last.
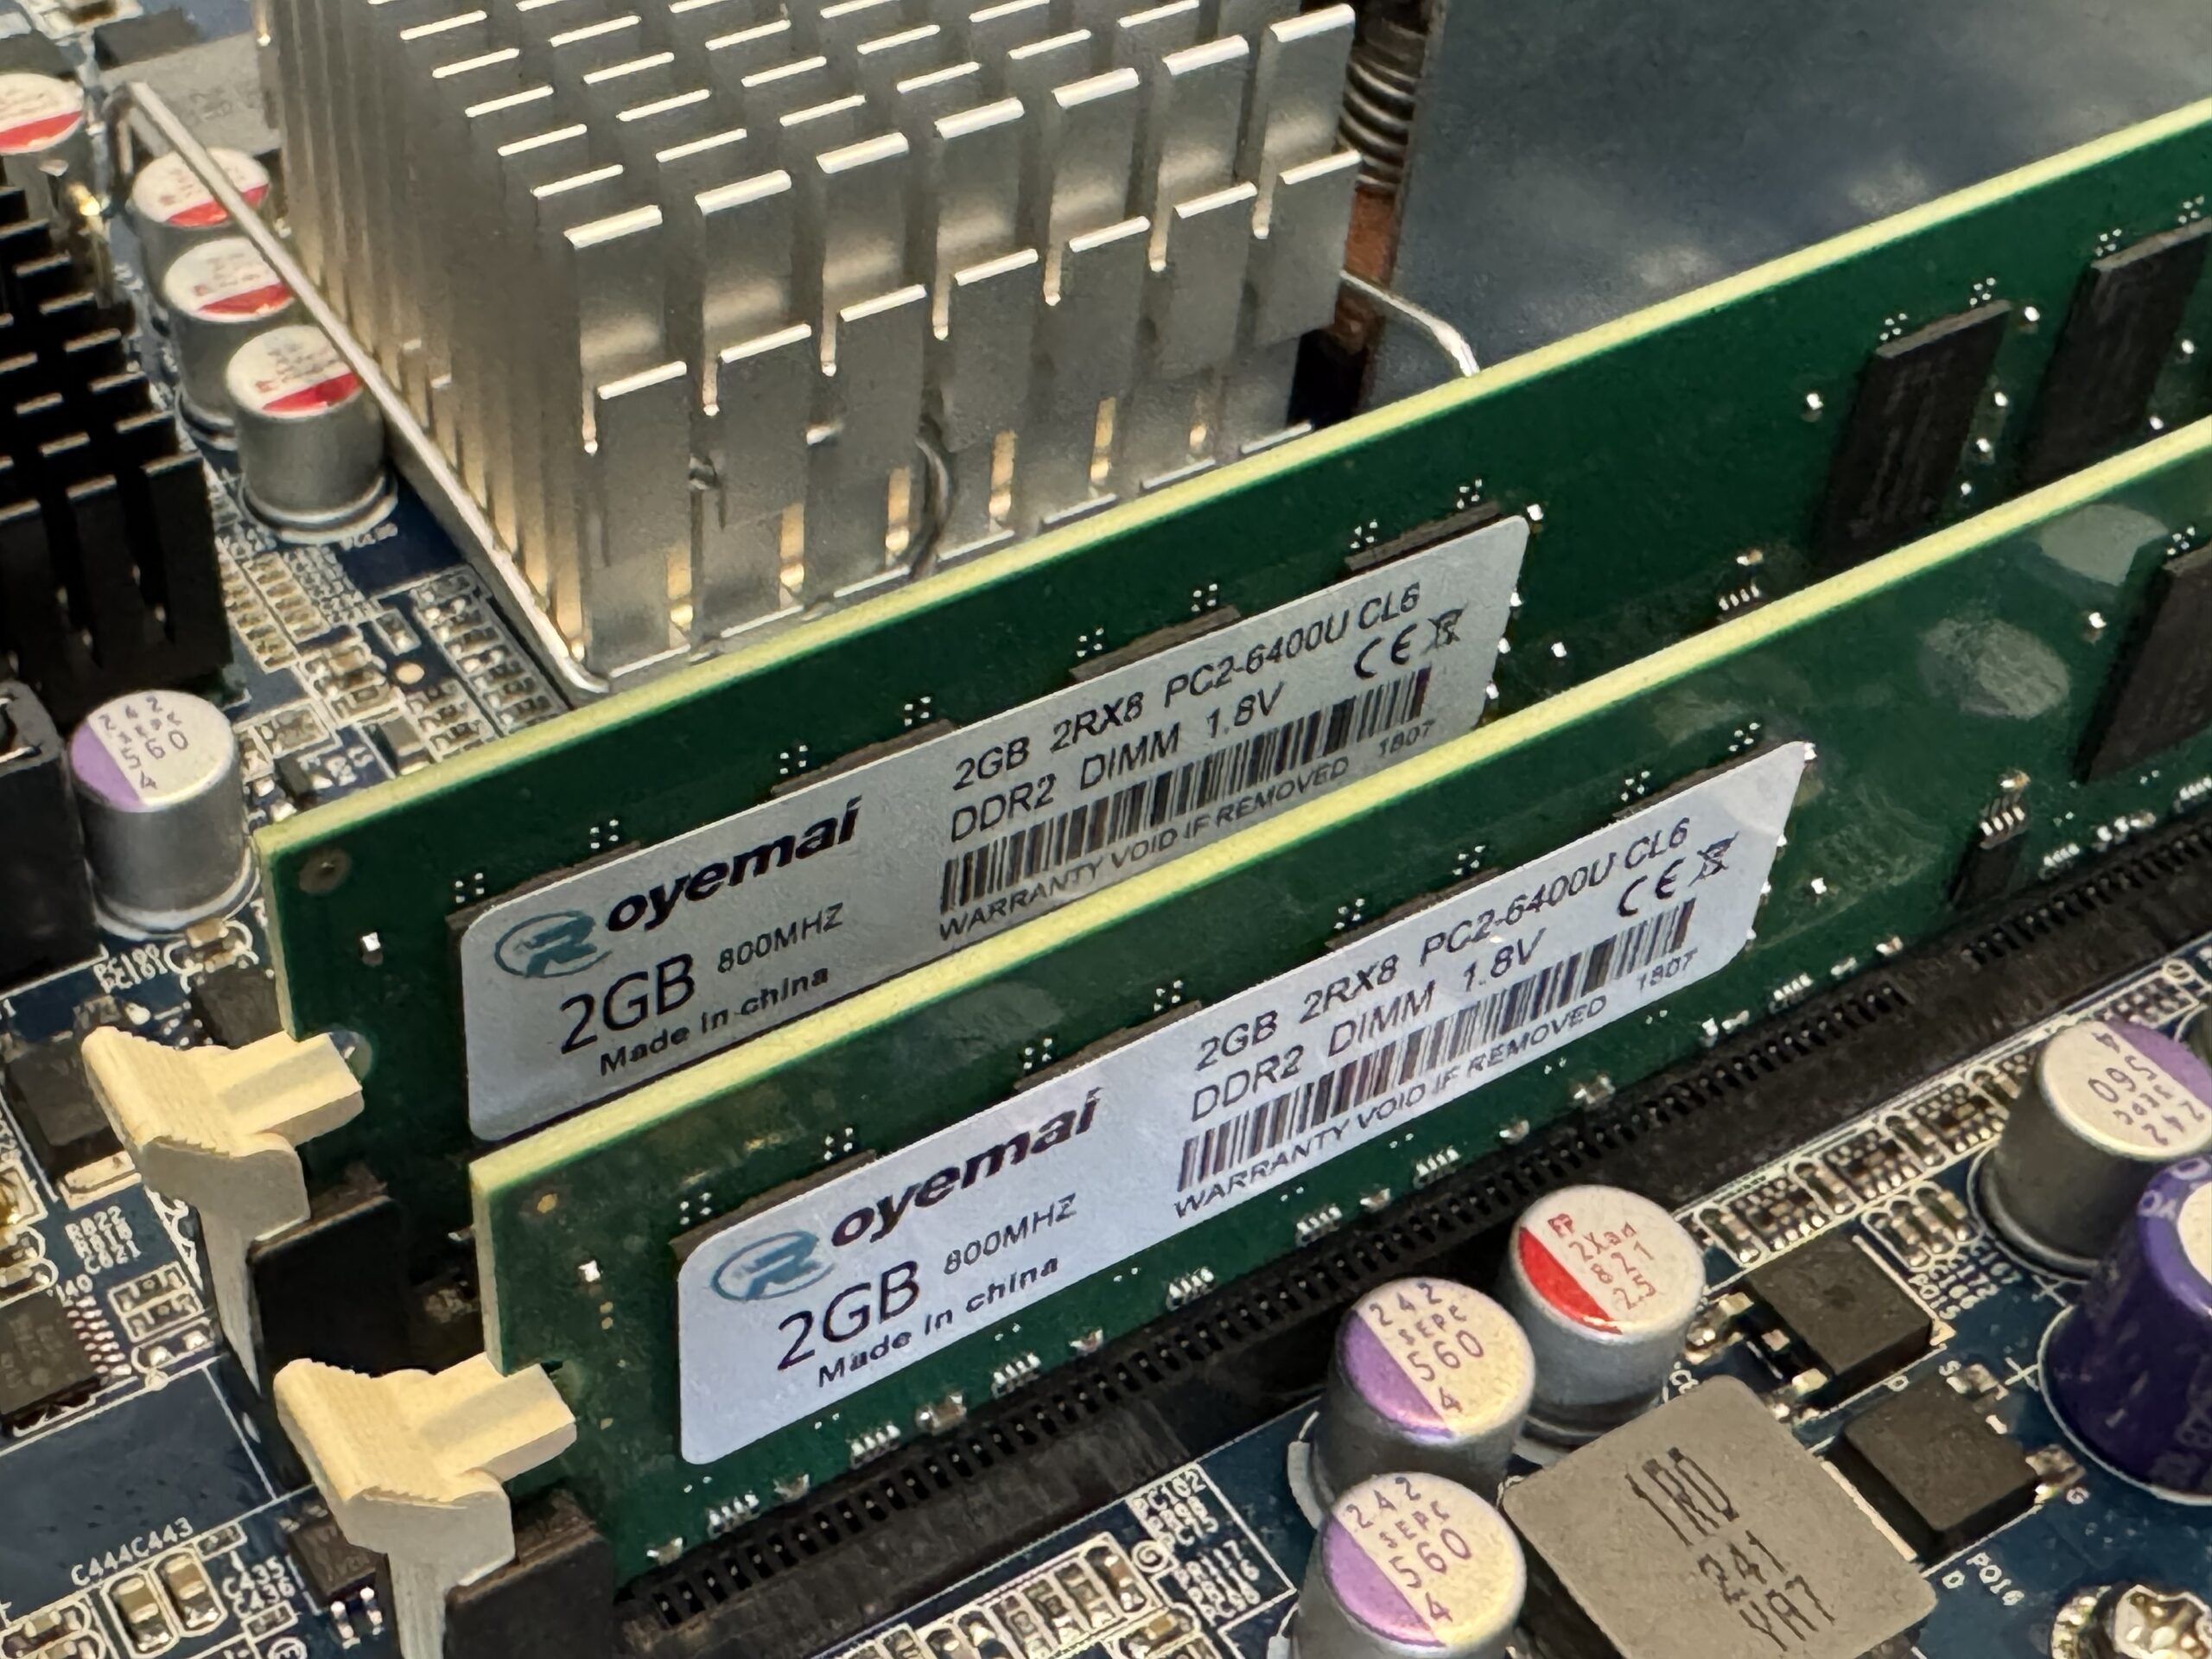
New RAM installed and recognised without drama for once.
💾 Adding the SSD
Next step was replacing the CF-based storage with something actually usable.
The SSD was installed and connected via SATA.
Physically, everything looked fine.
Booting, however, had other ideas.
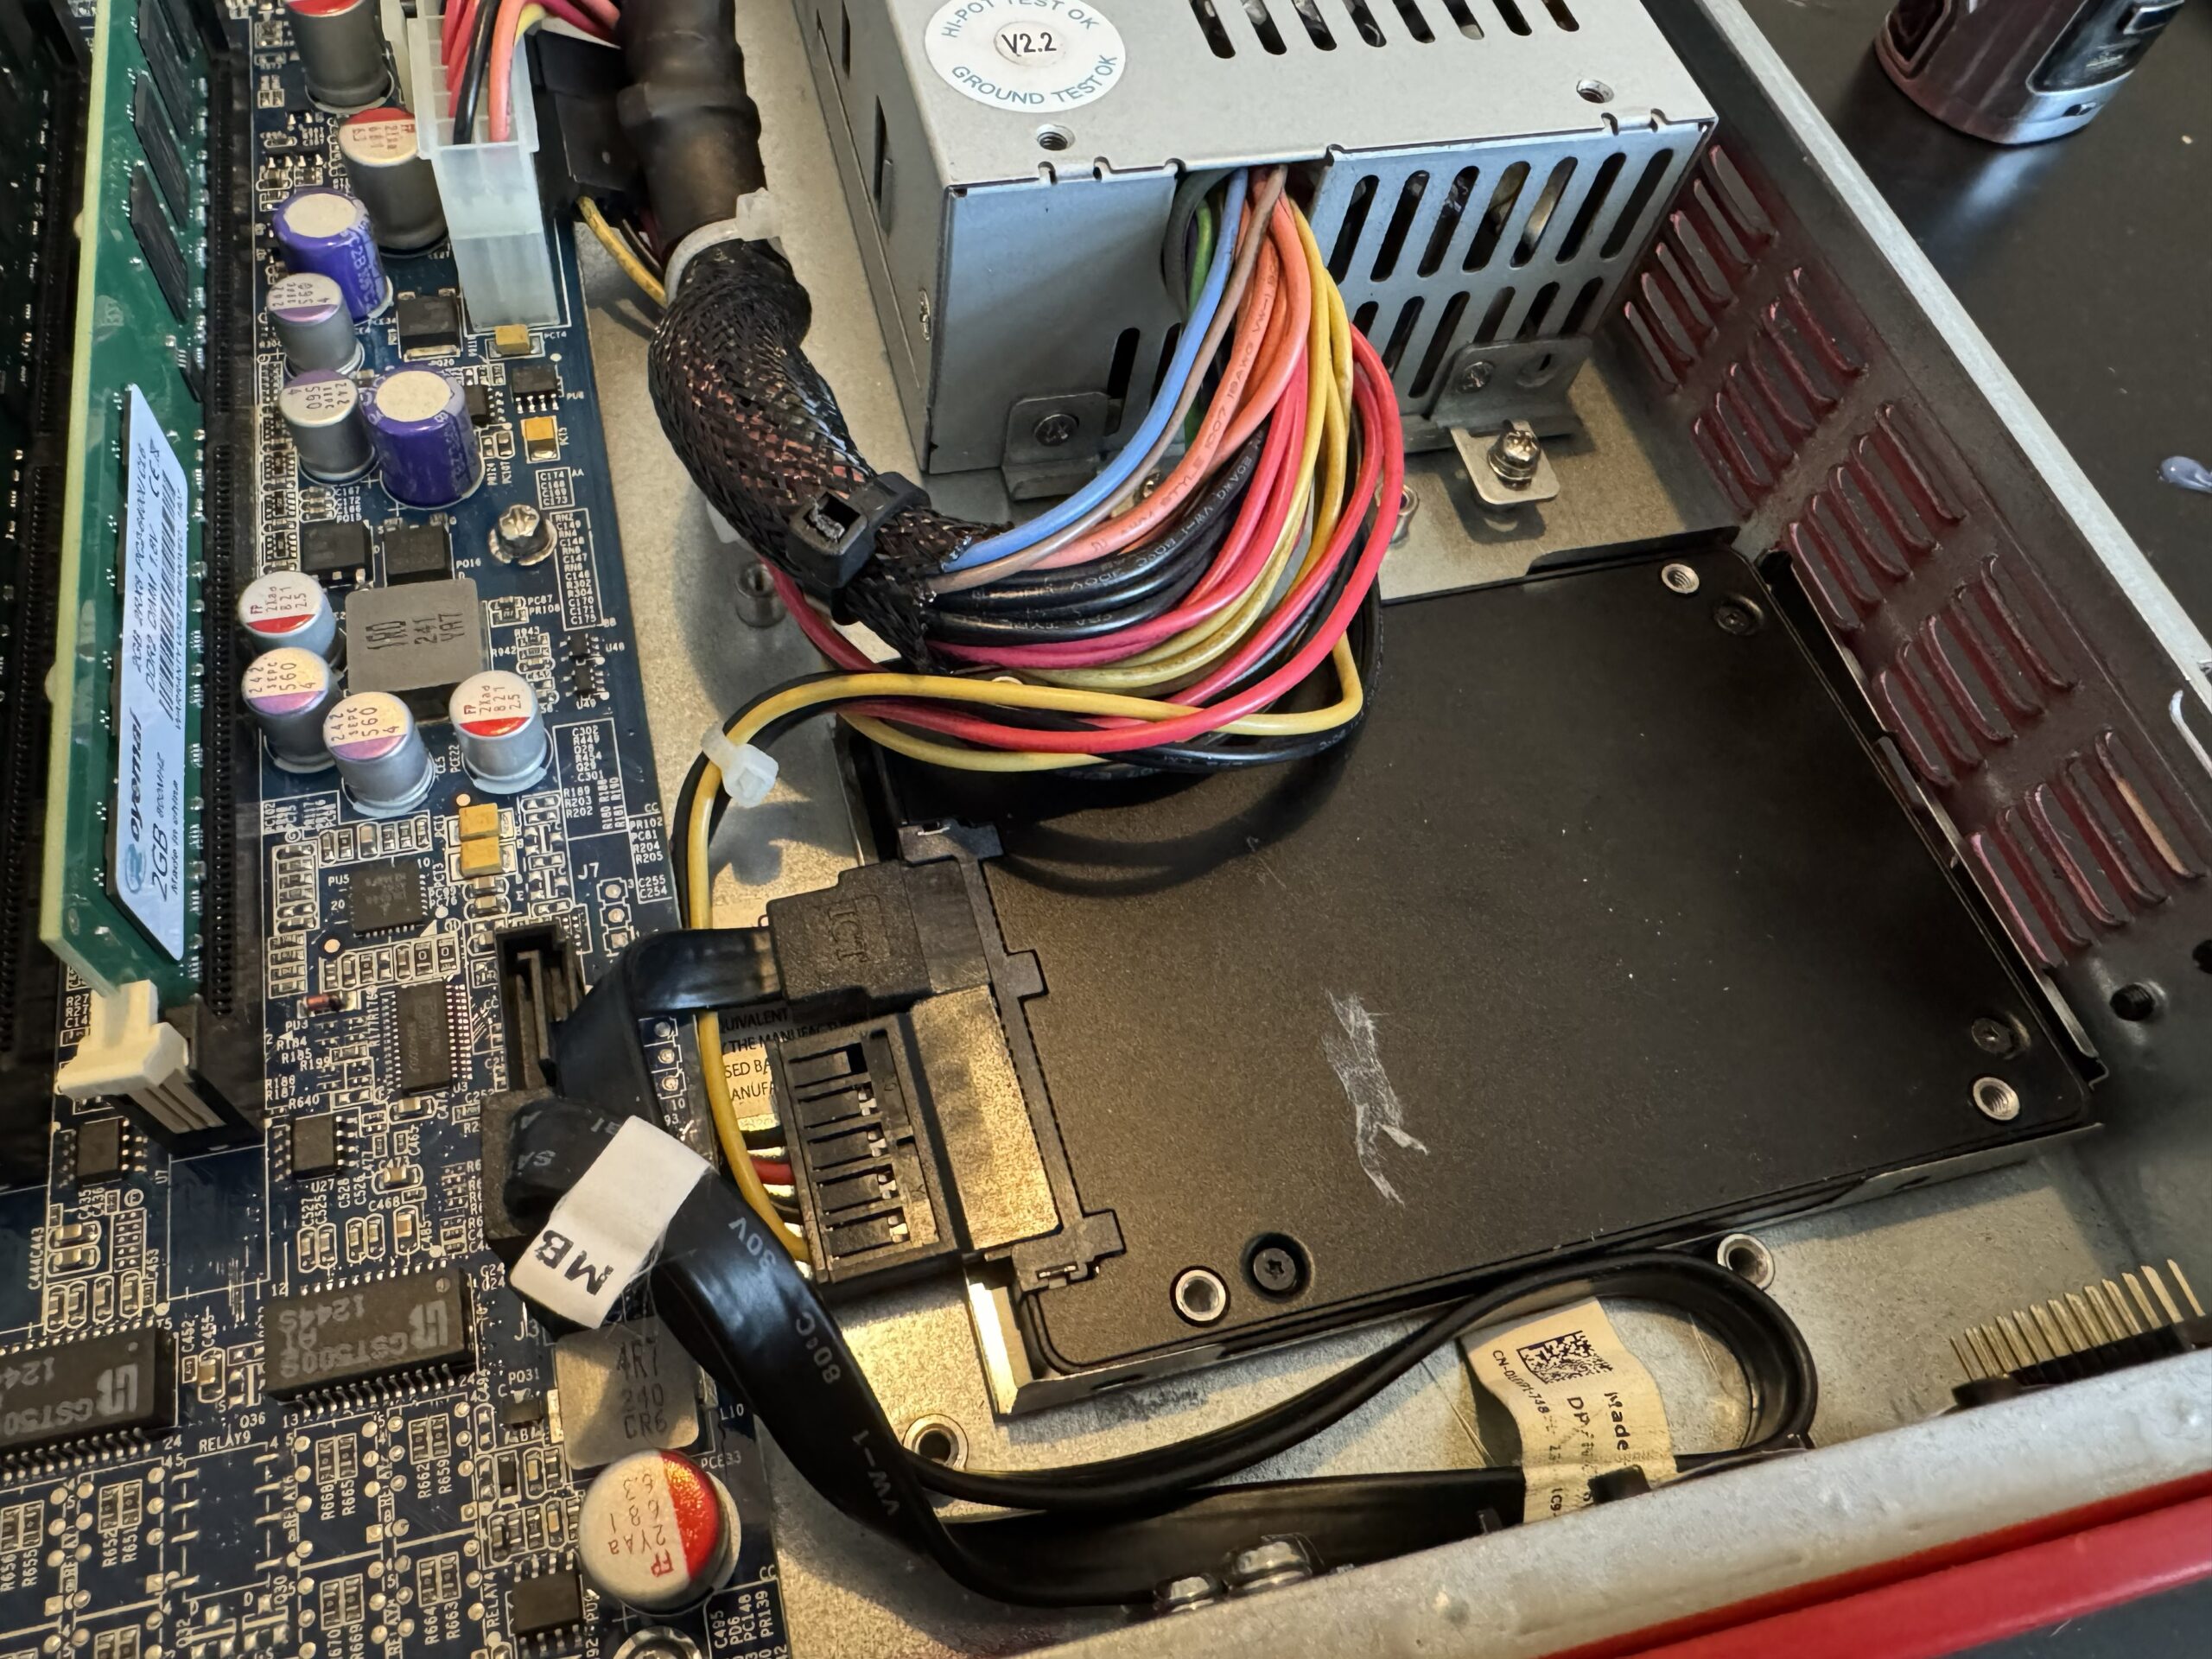
SSD fitted and connected, ready to replace the old CF-based setup.
💥 First Major Problem
With the SSD connected, the system refused to boot properly.
Without SATA connected: fine.
With SATA connected: chaos.
Multiple drives were tested. Same result every time.
At that point, it became pretty obvious the issue was not the SSD itself.
Something deeper was wrong.
⚙️ BIOS Investigation
Diving into the BIOS revealed the real problem.
Most of the settings that actually mattered were locked down, including storage configuration and boot behaviour.
The system was effectively stuck in an outdated mode that did not play nicely with modern drives.
That explained a lot.
Unfortunately, “understanding the problem” and “having a working firewall” are not the same thing.
🔥 Flashing an Unlocked BIOS
This was the turning point.
The BIOS was backed up and replaced with an unlocked version, which finally gave access to the settings that WatchGuard had locked away.
Once that was done, SATA mode could be changed to AHCI.
Immediately, behaviour improved.
The system could now boot with the SSD attached.
Which was a massive milestone, because up until that point it had mostly been acting like the whole upgrade was a personal insult.
💿 Installing OPNsense
With SATA finally working properly, OPNsense was installed onto the SSD.
The install completed successfully…
But the system still did not boot cleanly.
Because of course it didn’t.
At this stage the project had fully committed to the bit.
🛠️ Fixing the Install Properly
The initial install used a layout that this hardware clearly did not like.
So it was scrapped and redone properly:
- Extended install
- Manual setup
- MBR partitioning instead of GPT
This aligned much better with the older hardware.
Sometimes old kit just wants old rules, and fighting that usually ends in wasted hours and unnecessary swearing.
🔩 Final Boot Fix
One last issue remained: boot device selection and root mount behaviour.
The system needed the correct root mount defined manually so it would stop getting confused about where it was meant to be booting from.
Once that was sorted, the CF card could be removed entirely.
From that point on, it booted cleanly from SSD.
Which finally made this feel like a real repurpose job instead of a long argument with outdated firmware.
✅ OPNsense Running
After all of that, the system was finally running properly.
OPNsense installed. Stable. Updating. Booting correctly.
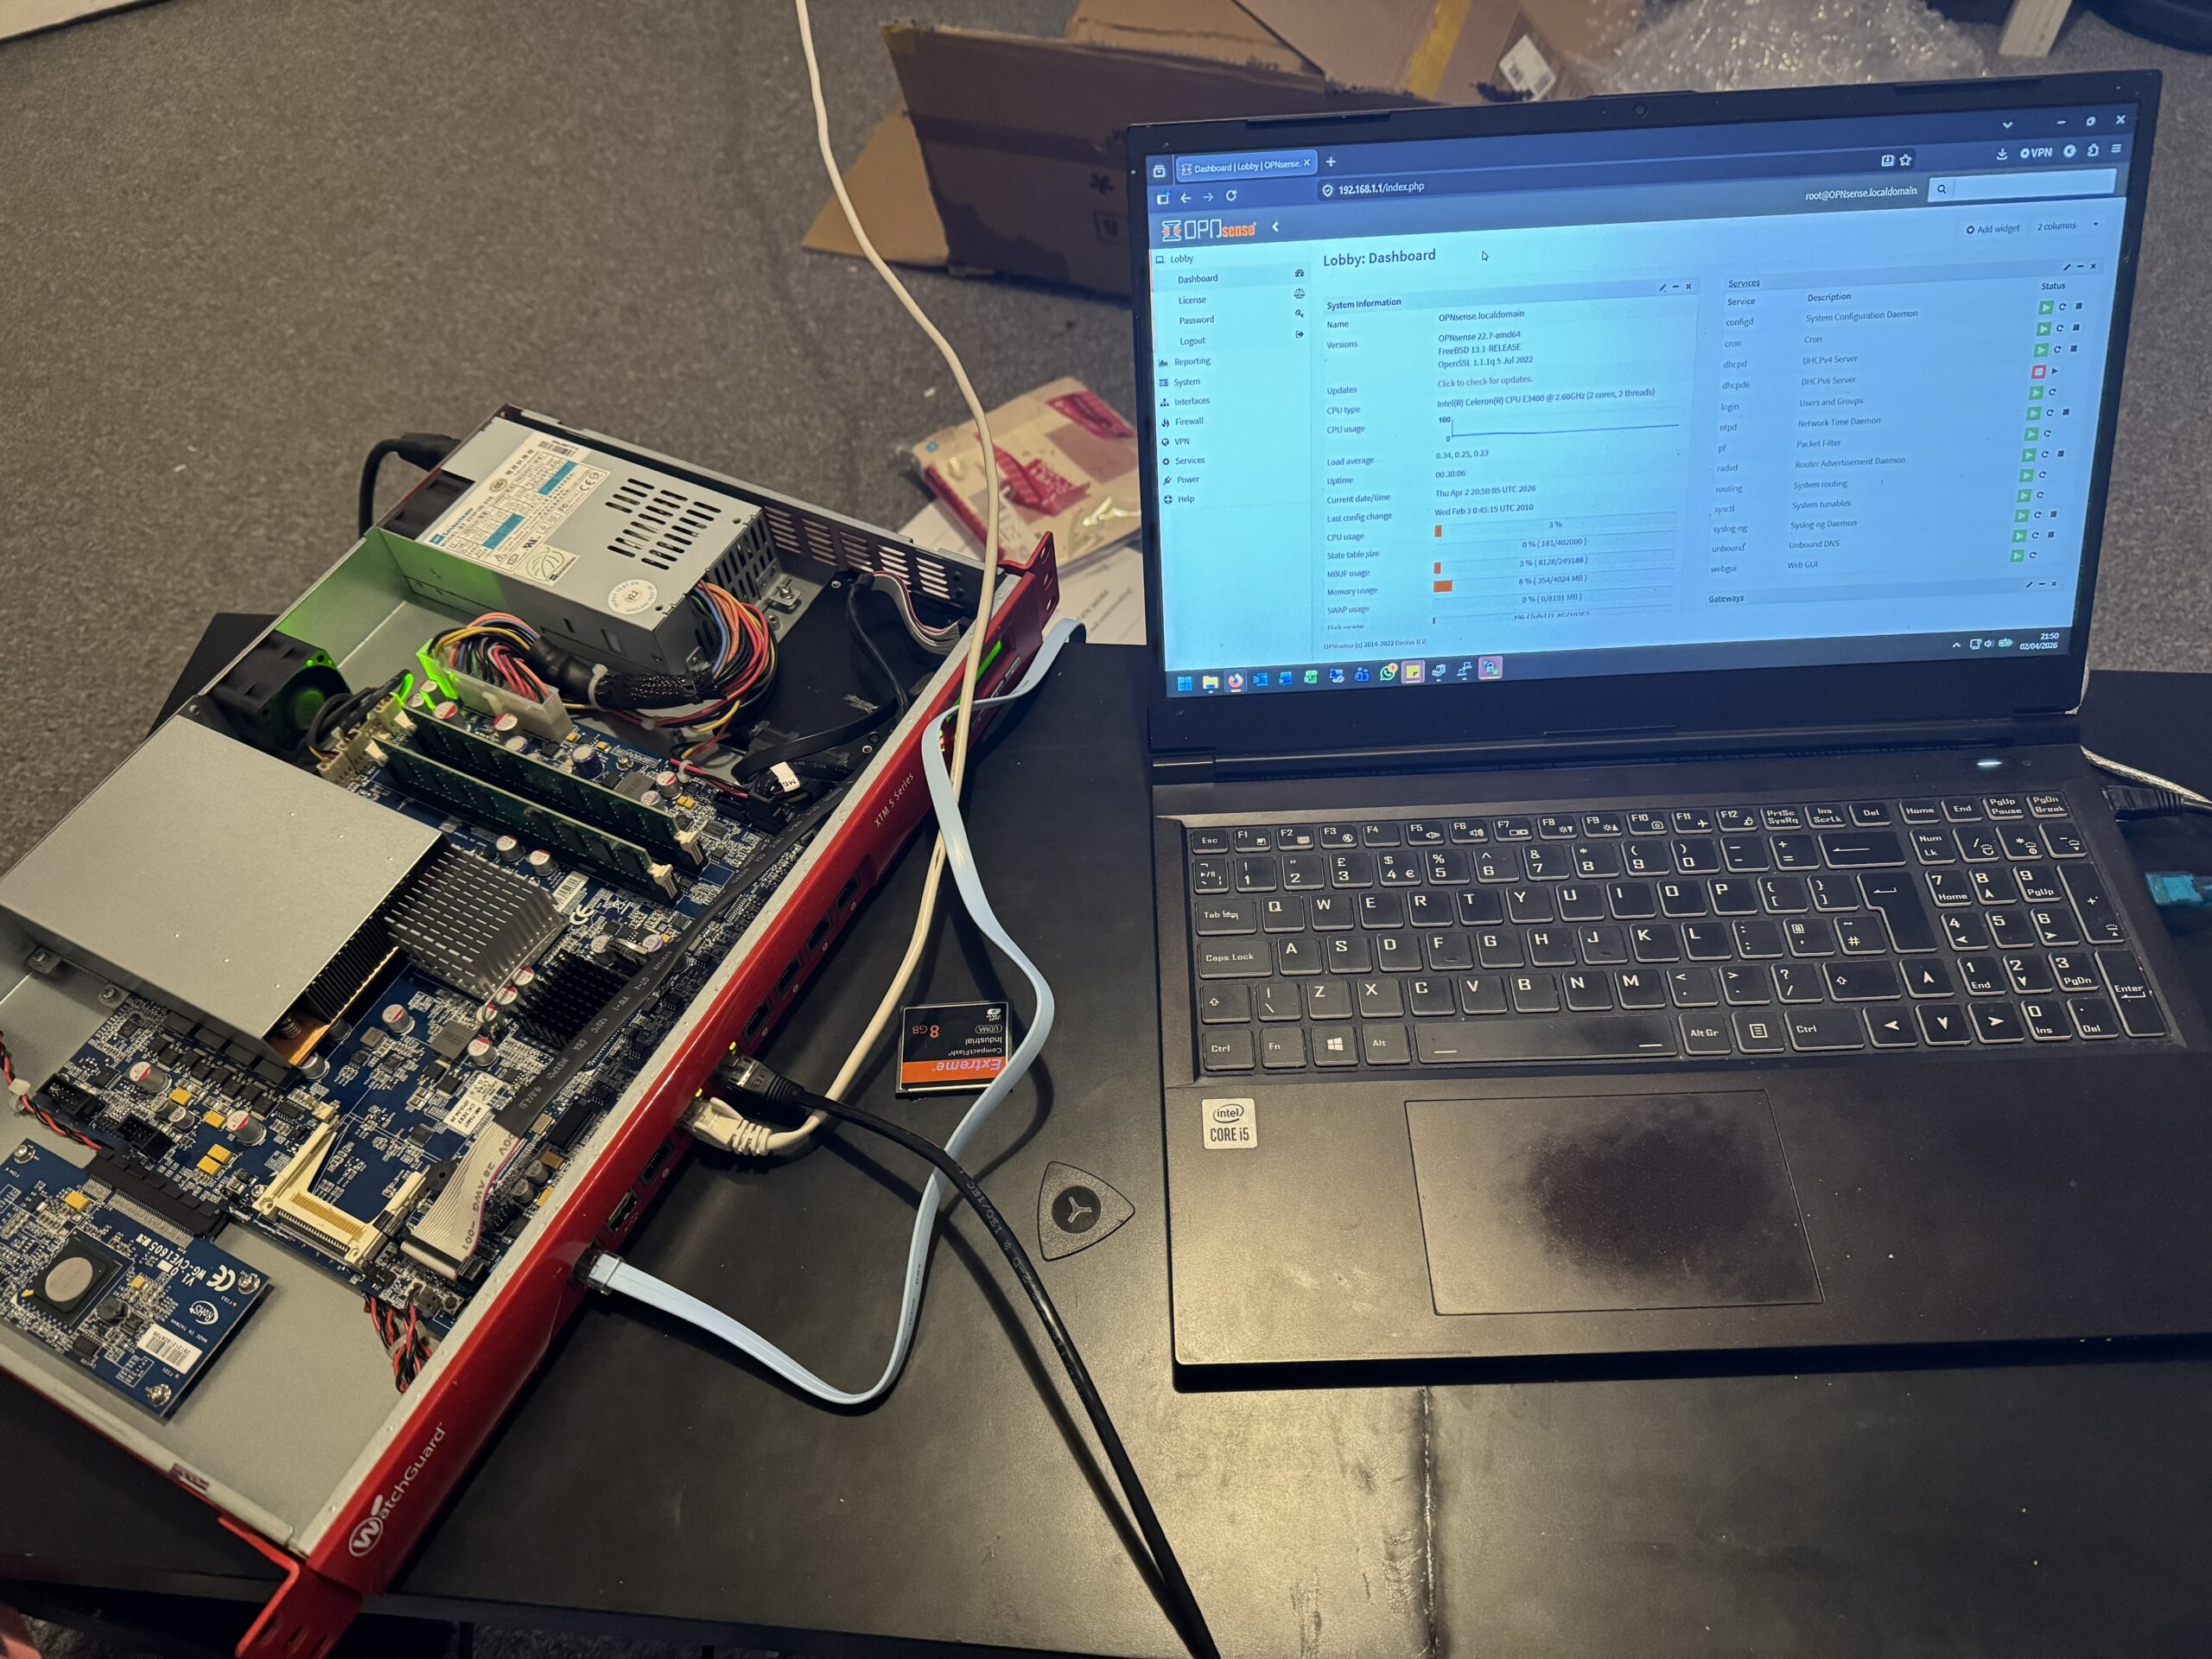
OPNsense running successfully after the storage and BIOS battle was finally won.
🔌 Final Configuration & Connections
With the system stable, it was time to wire everything back into the rack and get the network side configured properly.
This is where it stopped being a bench project and started becoming part of the actual setup.
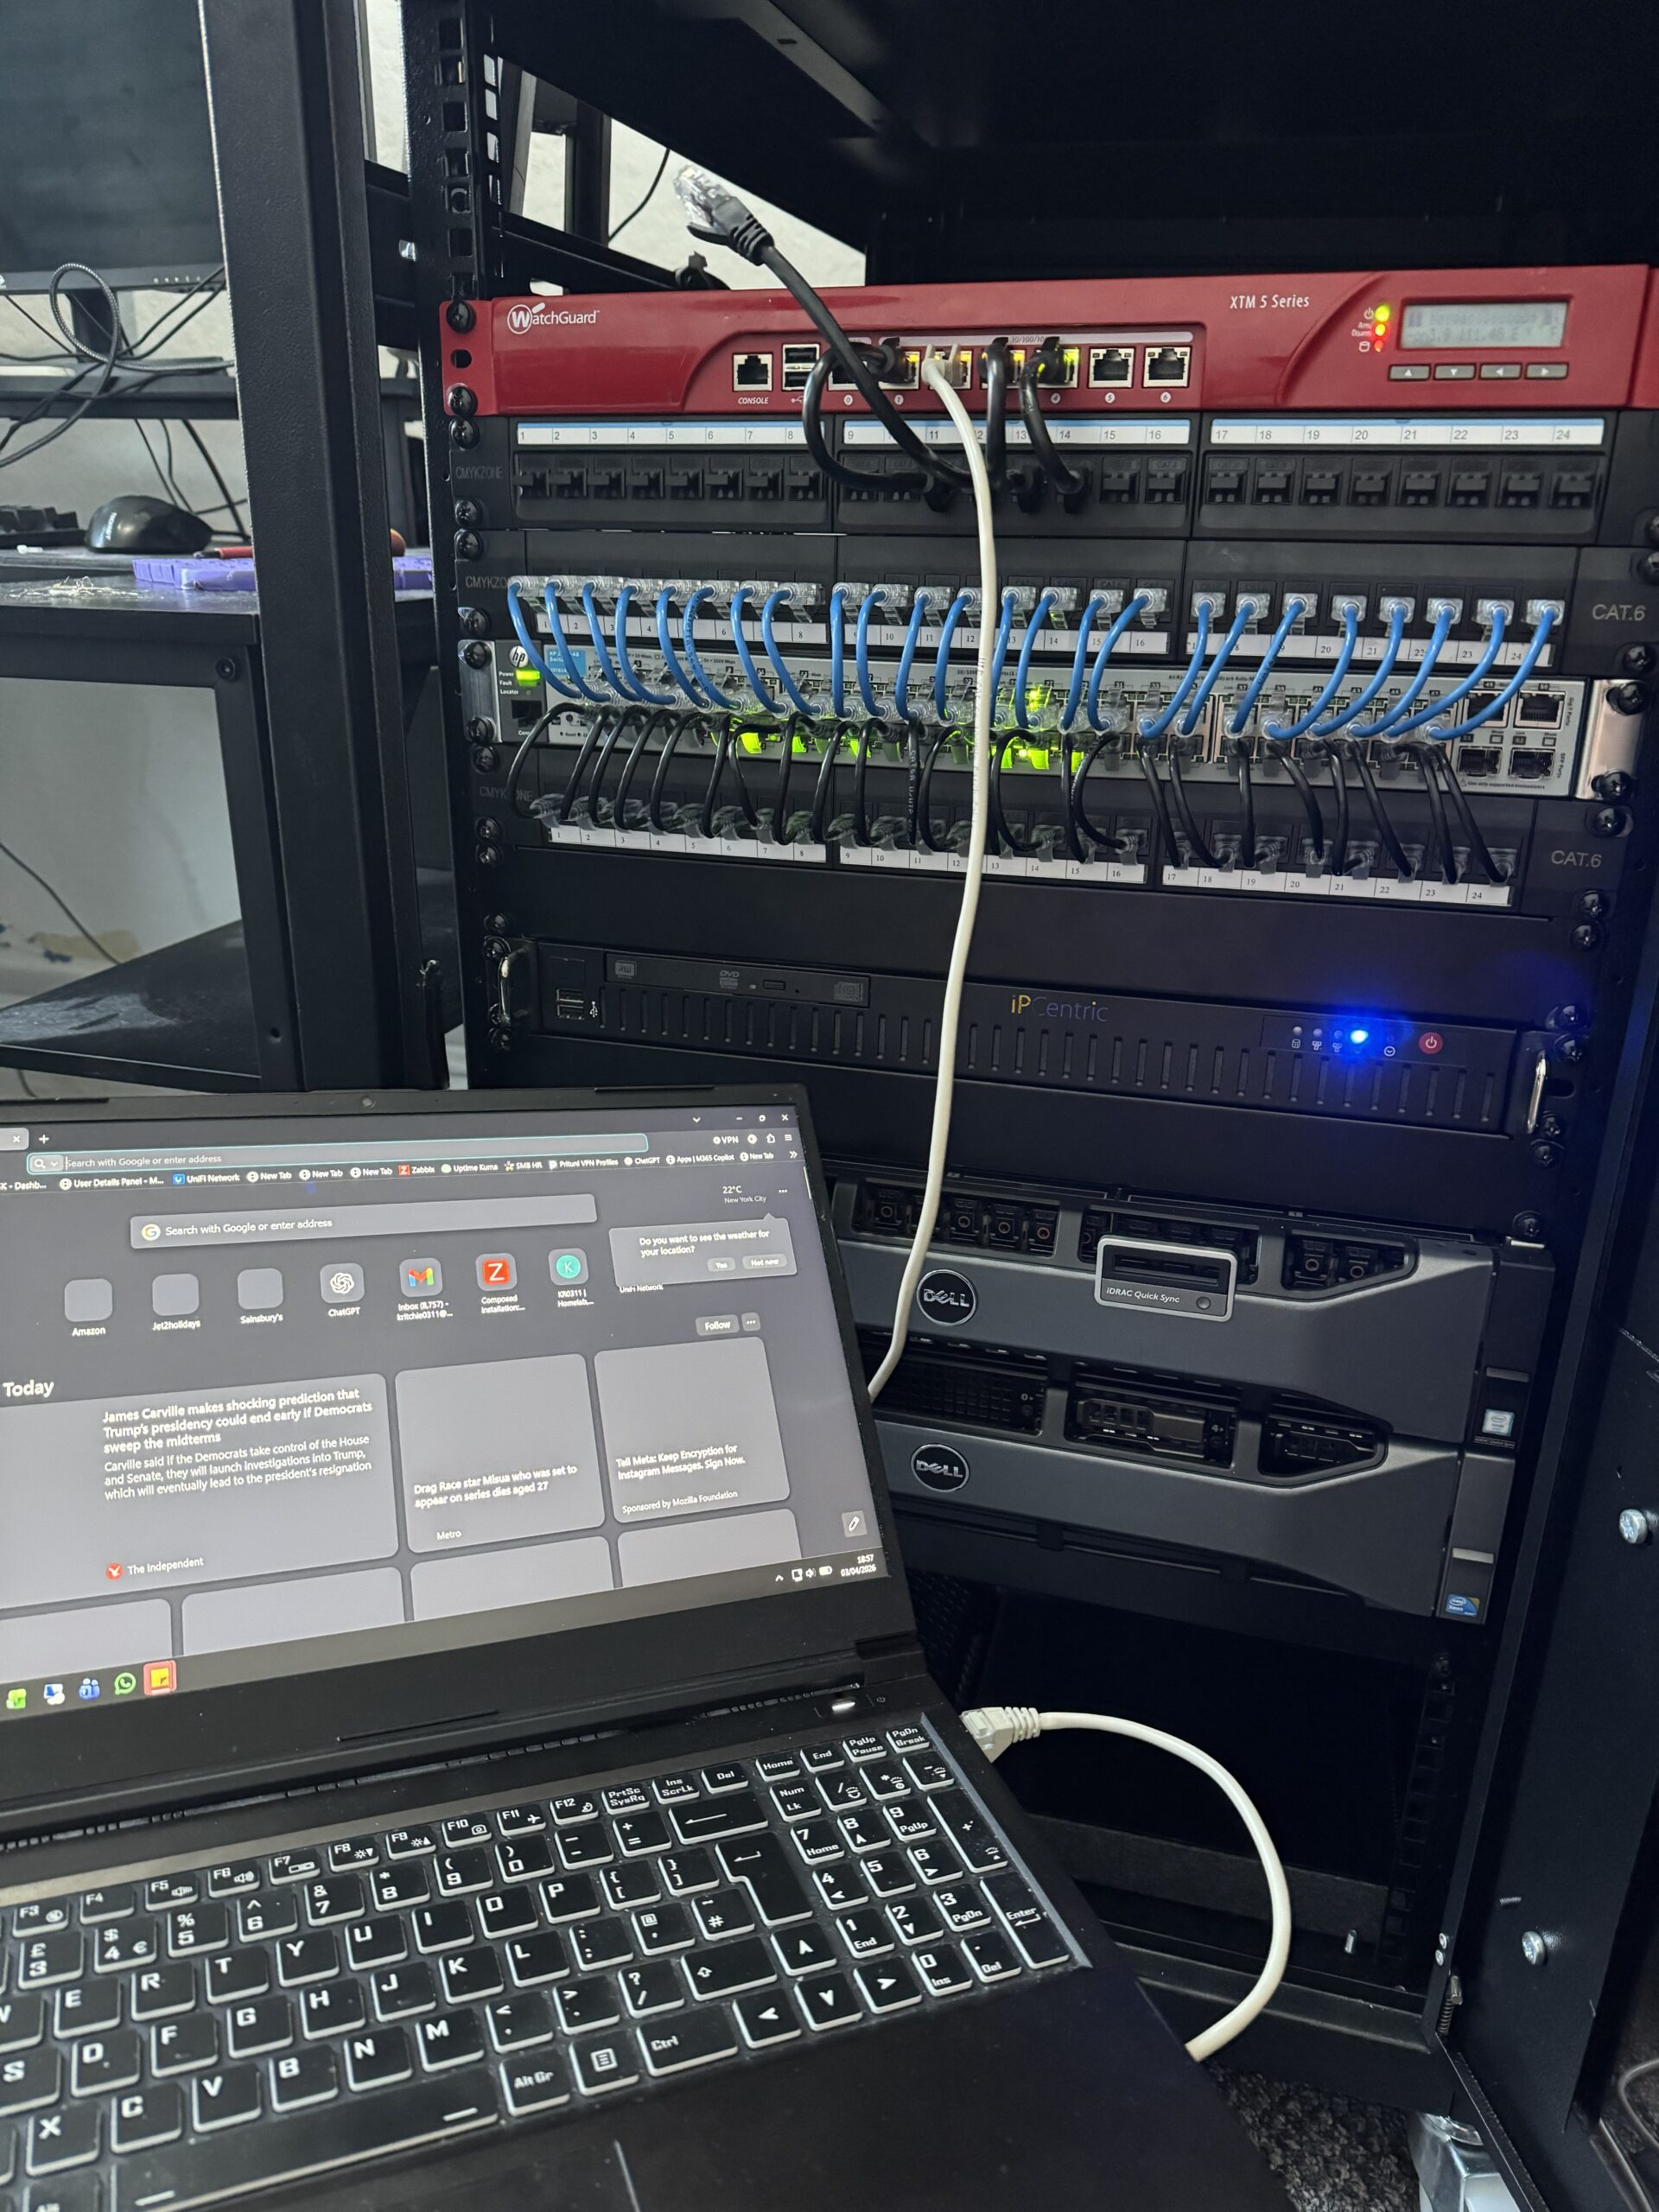
Final configuration and connection testing before it went back into the rack.
🧠 What Actually Caused the Trouble
In the end, the biggest problem was not the SSD.
It was not OPNsense either.
It was the locked-down BIOS and the outdated assumptions baked into the original configuration.
That was the thing causing the storage issues, the weird boot behaviour, and the general feeling that the whole device resented being modernised.
📚 Lessons Learned from Repurposing a WatchGuard XTM for OPNsense
- Locked BIOS settings can cause far more trouble than faulty hardware
- SATA configuration matters a lot more than you think
- Older hardware does not always like modern install defaults
- MBR still has its place
- Boot device naming can and will mess with you
This was one of those projects where every layer of the problem had another layer underneath it.
Very educational. Mildly irritating. Weirdly satisfying by the end.
🏁 Final Thoughts
What started as a simple upgrade turned into a full rebuild.
But the result is a properly functioning, SSD-based OPNsense firewall running on hardware that would otherwise probably have carried on collecting dust or pretending the early 2000s never ended.
And honestly, that makes the whole thing worth it.
Sometimes the best upgrades are not upgrades at all.
Sometimes they are full-blown second lives.
If you want to explore more projects like this, have a look through my KR0311 projects archive.
OPNsense itself is available from the official OPNsense website.
I’ll be putting together a proper write-up on the BIOS flashing process tomorrow, as that ended up being the biggest hurdle in this build.
Once it’s up, I’ll link it here along with the unlocked BIOS file I used in case it helps anyone else trying to do the same thing.